
How to Install Stair Runners: A Step-by-Step DIY Guide (With Costs)
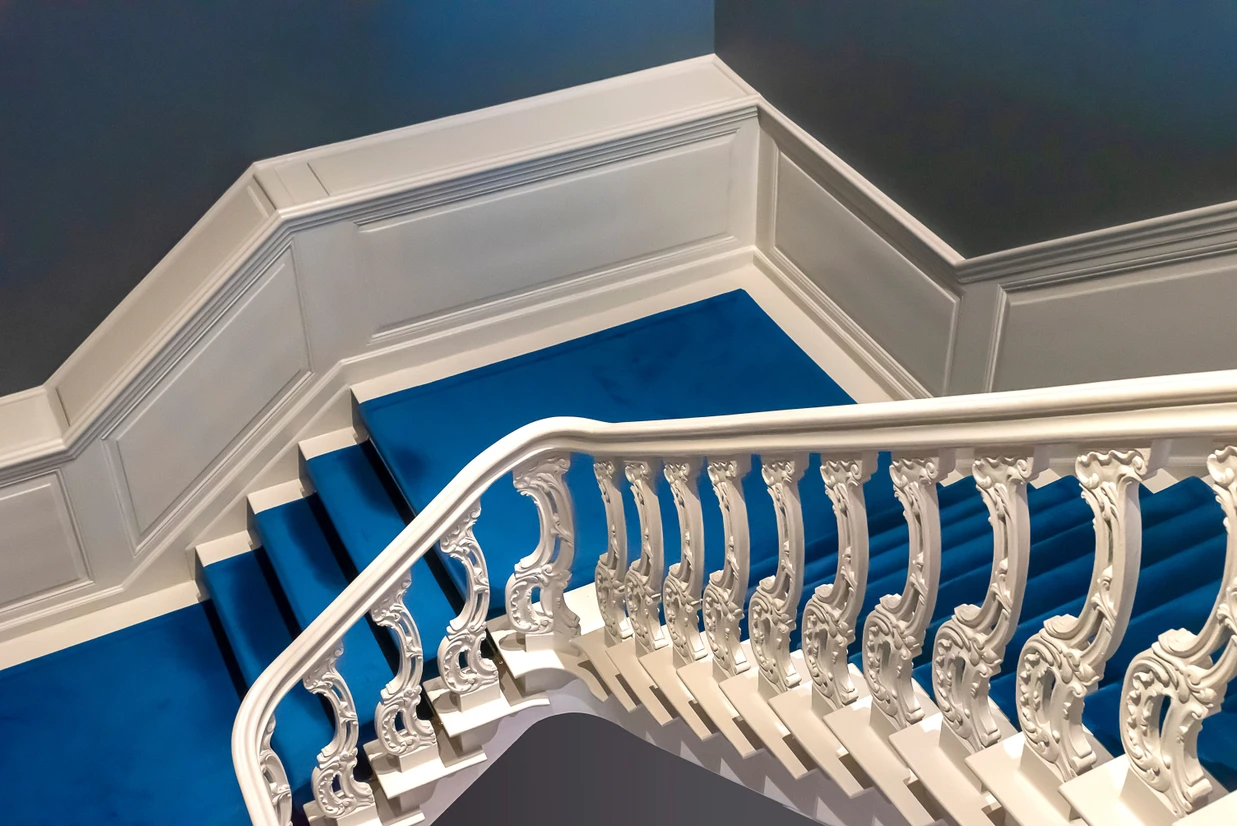
Learning how to install stair runners can transform a plain wooden staircase into a safer, quieter, more comfortable part of your home. A runner adds traction for kids, pets, and anyone navigating stairs in socks, while also helping protect the wood from everyday wear.
The good news? If you have a straight staircase, a staple gun, basic tools, and a free weekend, stair runner installation is a realistic DIY project.
This guide walks you through choosing the right runner, calculating how much you need, selecting an installation method, and installing it step by step. You’ll also find options for installing without nails, handling landings and corners, and deciding whether professional installation is worth the cost.
But first things first.
Can You Install a Stair Runner Yourself?
Yes, installing a stair runner yourself can be a manageable intermediate DIY project if you have a straight staircase and a pre-made runner. For 12–16 stairs, plan on about 6–10 hours of work, usually spread over a day or two.
You’ll need to be comfortable measuring carefully, using a staple gun, making straight cuts, and working patiently one stair at a time. The process isn’t especially complicated, but keeping the runner straight, evenly tensioned, and securely fastened takes care.
DIY gets trickier with winders, pie-shaped steps, multiple landings, or broadloom carpet that needs to be cut and bound. Valuable vintage or hand-knotted rugs are also best left to an experienced installer.
Before choosing a style, take a look at these stair runners for inspiration.
Choosing a Stair Runner That Will Actually Last on Stairs
A runner that looks beautiful on a hallway floor isn't necessarily suitable for stairs. Every step puts forward pressure on the material, and a loosely woven rug can stretch, skew, fray, or pull against its fasteners.
Look for a tight weave, low pile, and durable construction.
Weave and Material
The best materials for stair runner carpet installation include:
- Tight flatweave wool
- Low-pile wool blends (½ inch or less)
- Dense nylon
- Indoor-outdoor polypropylene flatweaves
Use caution with:
- Jute
- Sisal
- Cotton runners
- High-pile shag rugs
- Loosely woven handmade rugs
These materials can stretch, fray, shift, or create a tripping hazard around stair nosings. Patterns matter too. Stripes and borders look beautiful but require careful alignment. Tonal and all-over patterns are much more forgiving when you need to join multiple runners.
Width and Fit
Most stair runners are 27 to 32 inches wide, leaving approximately 3 to 5 inches of exposed wood on each side of the tread. For staircases narrower than 36 inches, a 24- to 26-inch runner often creates more balanced proportions. If you need a more precise fit, custom-size runners can be made to match the exact dimensions of your staircase.
Don't assume every tread is identical. Measure the staircase at the top, middle, and bottom, as wooden staircases are rarely perfectly square.
Pre-Made Rug Runners vs. Broadloom Carpet vs. Custom
Pre-made rug runners are the easiest option for DIY installation. They're sold in fixed lengths, have finished edges, and can be joined at risers.
Broadloom carpet can be cut to your required width and bound, creating one continuous runner. But this typically requires professional installation. A custom runner is useful when you need a specific width, length, edge finish, or configuration.
Waterfall vs. Hollywood: Which Stair Runner Installation Is Better?
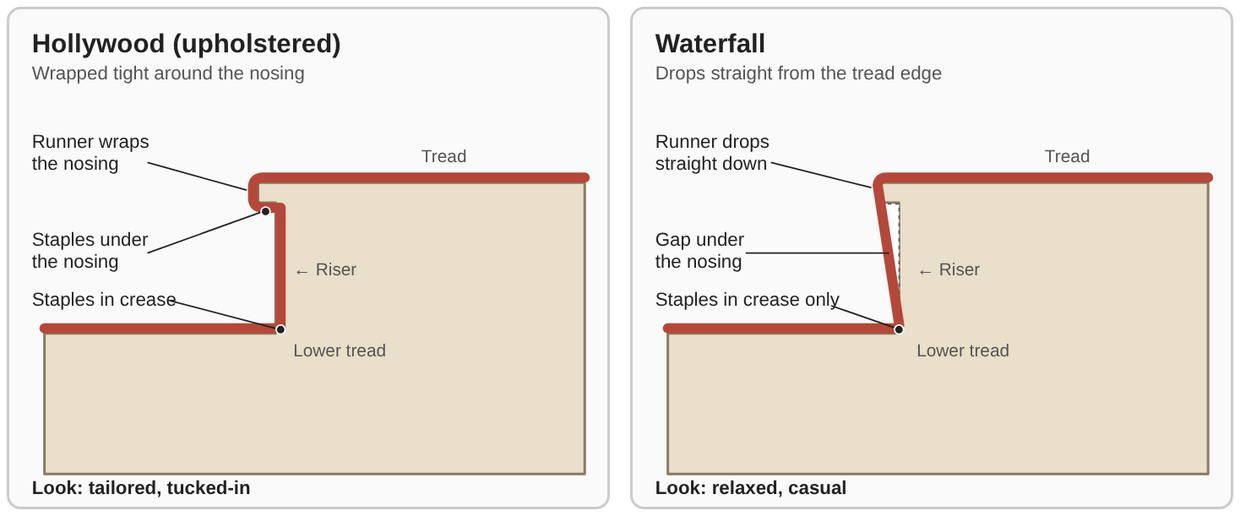
There are two common stapled installation styles: waterfall and Hollywood.
| Method | How It Works | Look | Difficulty | Time (12–16 stairs) | Runner Length Used | Hold / Longevity | Best For | Drawbacks |
|---|---|---|---|---|---|---|---|---|
| Hollywood (Upholstered) — stapled | Runner wrapped tightly around the nosing and stapled underneath it and in each riser/tread crease | Tailored, custom, tucked-in | Intermediate | 6–10 hours DIY | Highest (adds ~1"–2" per stair for the wrap) | Excellent — 10+ years with a tight weave | Bullnose treads, patterned runners, homes wanting a finished look | Slower; more staples; harder to remove later |
| Waterfall — stapled | Runner drops straight from the tread edge to the base of the next riser; stapled only in the crease | Relaxed, casual; small gap visible under nosing | Beginner–intermediate | 4–7 hours DIY | Lower | Very good — but thick rugs can gap or bounce at the nosing | Square-edge treads, thick or stiff runners, faster installs | Less tailored; gap can collect dust; shows nosing wear |
| Tackless strips + knee kicker (pro method) | Gripper strips fixed under the nosing/at the crease; carpet stretched onto pins | Seamless, wall-to-wall quality | Advanced / pro | 3–5 hours pro | Standard | Excellent for bound carpet | Custom-bound broadloom, landings, turns | Strips puncture treads; specialized tools; not for thin rug runners |
| Carpet tape only (no nails) | Heavy-duty double-sided tape on treads and risers; runner pressed on | Same as waterfall | Beginner | 2–4 hours | Standard | Fair — re-stick every 1–2 years; loosens with traffic and humidity | Renters, temporary installs, stairs you can't puncture | Residue risk on finished wood; shifting runner = fall hazard; not for jute or heavy rugs |
| Individual stair treads / rug tiles | Pre-cut non-slip pieces sit on each tread; adhesive-backed or gripper-backed | Modern, minimal; risers stay bare | Beginner | 1–2 hours | N/A (one piece per stair) | Good for traction; pieces can shift or peel over time | Floating/riser-less stairs, pet traction, rentals | Not a continuous runner look; replace individual treads as they wear |
| Custom bound carpet — pro installed | Broadloom cut, bound, and installed as one piece around landings and corners with strips or staples | Seamless, follows turns | Pro only | 4–8 hours pro (plus binding lead time) | Custom | Excellent — 10–20 years for wool/nylon | L/U-shaped stairs, landings, exact widths, high-end finish | Highest cost; long lead time; hard to change later |
Hollywood installation wraps the runner around the nosing, creating a tightly upholstered appearance. It requires more staples and slightly more runner because each stair needs additional material for the wrap, but it gives a polished finish and works particularly well with bullnose treads.
Waterfall installation lets the runner fall directly from the front edge of one tread to the base of the next riser. It's faster and uses less material, making it a good choice for square-edge stairs or thicker, stiffer runners.
For most traditional wooden staircases with rounded nosings, Hollywood is the better-looking choice. If speed matters or your stairs have square nosings, waterfall can be perfectly practical.
Tools and Materials Checklist
Tools
You'll need:
- Heavy-duty manual, electric, or pneumatic staple gun
- Narrow-crown staples
- Tape measure
- Painter's tape
- Pencil or chalk
- Straightedge
- Utility knife with fresh blades
- Heavy scissors
- Stair tool, painter's 5-in-1, or putty knife
- Rubber mallet or knee kicker, if needed
- Drill and small bits for stair rods
- Pipe cutter or hacksaw for trimming rods
- Black marker for disguising staples on dark runners
A manual staple gun works for one staircase but can become tiring. An electric staple gun is the best value for most DIYers, while a pneumatic gun and compressor are fastest and closest to professional equipment.
Use approximately ½–⁹⁄₁₆-inch narrow-crown staples, or shorter ⅜–½-inch staples for thin flatweaves. The staple should secure the runner without penetrating through the stair.
Materials
You'll need:
- Runner material
- Carpet pad
- Staples
- Double-sided carpet tape
- Stair rods (optional)
According to the international standard for textile floor coverings on stairs, "the use and type of underlay play an important part in the subsequent performance of the carpet on stairs."
A dense ⅛–¼-inch felt or felt-rubber pad adds cushioning and helps protect the runner from wear. Cut it approximately 1 inch narrower than the runner on each side and use it on the treads. Avoid very thick padding because it can raise the nosing and create a trip edge.
For no-staple installations, some homeowners use carpet tape for stair treads as a supplemental holding method.
How Many Stair Runners Do You Need?
For each stair, calculate the runner length by adding the tread depth, riser height, and about 1–2 inches for wrapping around the nosing. Most stairs require roughly 17–20 inches of runner per step.
A simple formula:
Total Length = (Stair Count × 17–20 inches) + Finish Allowance + 10% Waste
Example:
- 14 stairs
- 19 inches per stair
Calculation:
- 14 × 19 = 266 inches
- Add 8 inches finishing allowance
- Add 10% extra
Total needed ≈ 300 inches (25 feet)
In practice, many homeowners deliberately buy one extra runner and return the unused piece if possible. Patterned runners should always include extra material for matching repeats.
How to Install Stair Runners on Wood Stairs: Step by Step
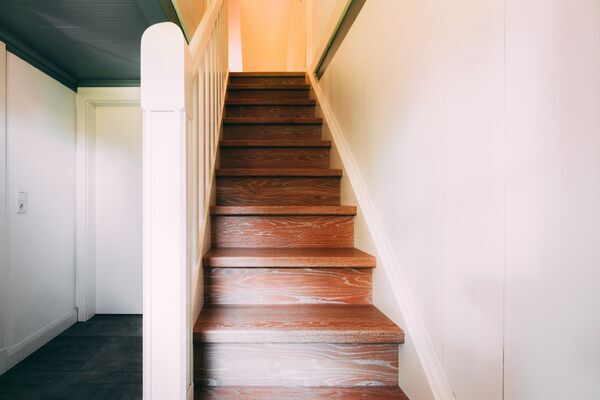
Step 1: Prep the Staircase
Remove existing carpet, tack strips, and old staples. Sand rough areas and fill nail holes.
If you're refinishing or painting the staircase, complete that work first and allow the finish to cure completely. Covering uncured paint or finish can trap moisture or damage the surface.
Clean every tread and riser thoroughly before installation.
Step 2: Measure and Mark the Runner Path
Measure the tread width at several points. Subtract the runner width and divide the remaining space by two to determine your side margins.
Here's an important installer trick: don't automatically center every stair. If your staircase isn't perfectly square, centering each tread can cause the runner to gradually drift from one side to the other. Instead, choose one edge and maintain a consistent measurement from that side all the way up the staircase.
This is especially important with stripes and borders. Use painter's tape to mark both sides of the intended runner path.
Step 3: Cut and Install the Carpet Pad
Cut the pad to match the tread depth, or include enough material to wrap slightly over the nosing. Keep the pad approximately 1 inch narrower than the runner on each side.
Secure it at the back of each tread and just underneath the nosing. You can use a few staples or small pieces of carpet tape to hold it in position.
Keep the main pad on the treads rather than covering the risers. For another fastening option, carpet tape for stair treads can help hold materials temporarily.
Step 4: Start at the Top
Start at the top of the staircase. Position the finished end of the runner under the top tread's nosing or against the top riser. The goal is to make the visible starting point look finished while establishing a straight reference for the entire staircase.
Staple across the top edge at the riser/tread joint, approximately every 2–3 inches, working from the center outward. Don't rush this first attachment. If the runner starts crooked, every stair below it will be harder to correct.
Step 5: Work Down One Stair at a Time
For a Hollywood installation, pull the runner tightly over the nosing. Staple underneath the nosing approximately every 3–4 inches. Then pull the runner taut down the riser and press it firmly into the crease where the riser meets the next tread. Use a stair tool or putty knife to push the fabric into the crease.
Staple along the crease every 2–3 inches, working from the center toward each side. For a waterfall installation, staple at the crease and allow the runner to fall straight over the nosing.
Check your painter's-tape alignment after every stair. Maintain even tension so the runner doesn't gradually twist or cause a stripe to drift. Angle staples slightly into the weave so they are less noticeable. On dark runners, use a black marker to disguise any exposed staple heads.
See these tips for installing a custom stair runner for additional guidance when working with a custom installation.
Step 6: Join Runners Where One Runs Out
Never place a runner seam in the middle of a tread. Instead, end one runner where the riser meets the tread or just underneath the nosing. The cut end should tuck into the crease. Position the finished edge of the next runner directly over it.
Secure the join through the appropriate layers so the seam sits in the shadow line. If the runner has a repeating pattern, take time to align the design before cutting. Borders can make this particularly tricky and may require trimming at the join.
For loose or fray-prone materials, reinforce the back of the runner before cutting. Fabric glue, binding, or professional edge finishing may also be appropriate.
Step 7: Finish at the Bottom
Plan your final runner length so a finished edge lands neatly at the bottom of the staircase.
If your final piece won't finish cleanly, there's a useful installer trick: install the final runner section from the bottom upward. This lets you place the factory-finished edge at floor level while hiding the cut edge higher up in a riser crease. You can also finish at the bottom of the last riser or wrap the runner underneath the final tread nosing.
Step 8: Install Stair Rods
Stair rods are decorative rather than structural when you're using a stapled runner. They can give the staircase a traditional finished appearance and help disguise seams or staples.
Choose rods approximately 2–4 inches wider than the runner. Trim them if necessary, center each rod on the stair, pre-drill the holes, and attach the brackets just outside the runner's edges.
Before installation, it's also a good idea to review applicable stair safety guidelines to help ensure the staircase remains safe and comfortable to use.
Step 9: Do a Final Check
Walk the entire staircase slowly.
Look for:
- Loose edges
- Bubbles
- Uneven tension
- Raised staples
- Shifting seams
- Runner edges that have pulled away
Add fasteners where necessary, then vacuum the runner.
How to Install a Stair Runner Without Nails or Staples
You can install a stair runner without nails or staples, but the trade-off is security and longevity.
The easiest option is heavy-duty double-sided carpet tape applied to the treads and risers. It's inexpensive and avoids puncturing finished wood, but it can loosen with humidity and heavy traffic. On finished wood, always test the adhesive in an inconspicuous area first.
A second option is a removable tackless or hook-and-loop system. These can provide more holding power while allowing easier removal, though professional carpet installation standards often rely on more secure fastening methods for stairs.
Individual non-slip stair treads are another practical choice, especially for floating or riser-less stairs. They don't create the continuous appearance of a runner, but they're quick to install and can provide traction.
Any no-nail installation should be checked regularly. A shifting runner on stairs can create a serious fall hazard.
Landings, Corners, and Narrow Stairs
Landings
If two flights align, you can run one continuous runner across the landing. This is easiest with professionally bound carpet.
With pre-made rug runners, it's often simpler to finish the first runner at the landing, place a separate rug or runner section, and begin the next flight independently. Secure landing rugs with a suitable pad and additional fastening where appropriate.
Turns and Corners
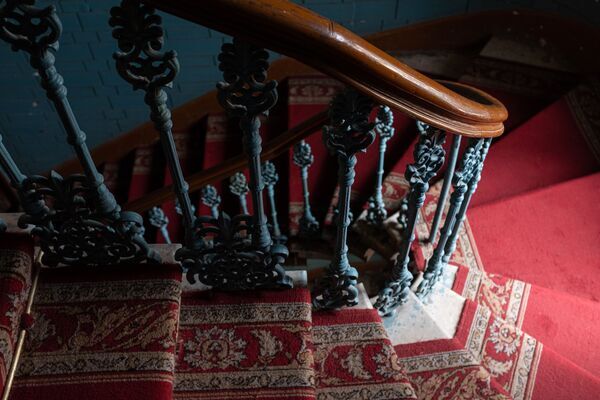
For an L- or U-shaped staircase, pre-made rug runners usually work best as separate sections. Finish the first runner before the turn, then begin the next runner square to the new flight. With bound carpet, a professional can miter and seam the corner so the pattern follows the turn continuously.
Pie-shaped or winder stairs are significantly more complicated. Each tread is trapezoidal rather than rectangular, so the runner needs to be cut and tapered individually. This is generally a professional installation job.
Narrow or Irregular Stairs
For stairs narrower than 36 inches, a 24–26-inch runner often provides better proportions while maintaining approximately 2–3 inches of exposed wood per side. If the staircase changes width, follow one edge consistently rather than repeatedly recentering the runner.
Custom Stair Runner Installation: When Is It Worth It?
Custom stair runner installation DIY project typically involves taking broadloom carpet or a large rug, cutting it to the required dimensions, binding the edges, and installing it as one continuous piece.
It's particularly worthwhile when you have:
- Multiple landings
- L- or U-shaped stairs
- Winder steps
- Multiple flights
- Unusual stair widths
- A specific carpet you want to use
- A high-end finish where visible seams aren't acceptable
The usual process is measure → select carpet → cut and bind → install.
Binding is normally handled by a carpet shop or upholsterer. Professional installers may then use tackless strips, a knee kicker, staples, or another appropriate method.
For complex staircases, hiring an experienced installer can save you from wasting expensive carpet through inaccurate cuts. The professional carpet installation resources can also help you understand the level of expertise involved.
Stair Runner Installation Cost: DIY vs. Professional
DIY stair runner installation typically costs between $300 and $1,200 on a straight 12- to 16-step staircase.
Typical cost ranges:
| Line Item | DIY with Pre-Made Rug Runners | Pro Install of Pre-Made Runners | Custom Bound Carpet Runner (Pro) | Notes |
|---|---|---|---|---|
| Runners / carpet | $250–$900 (3–4 runners at $60–$250 each) | $250–$900 | $600–$2,500 (broadloom by the yard or a large rug cut down) | Wool and hand-knotted at the top of range; indoor-outdoor flatweave at the bottom |
| Binding / cutting to size | $0 | $0 | $100–$300 | Only needed for broadloom or cut-down rugs |
| Carpet pad | $40–$120 (2–3 pads or one roll, cut to treads) | $60–$150 | $100–$250 (custom-cut stair pad) | ⅛"–¼" felt or felt-rubber |
| Fasteners (staples, tape) | $20–$60 (staples + 1–2 rolls tape) | Included | Included | Tape-only "no nails" installs: $40–$100 in tape |
| Tools | $0–$150 (manual or electric staple gun, stair tool, blades) | Included | Included | Pneumatic gun + compressor $150–$300 if you don't own one |
| Labor | $0 (6–10 hours of your time) | $400–$900 | $500–$1,200 | Regional rates vary; landings and turns add $100–$300 each |
| Old carpet removal & prep | $0–$50 (your time, filler, touch-up paint) | $100–$300 if included | $100–$300 | Refinishing treads is a separate project ($300–$1,000+) |
| Stair rods & brackets (optional) | $300–$1,200 (12–16 rods at $25–$75 each) | $300–$1,200 + $100–$200 install | $300–$1,500 | The largest optional line; easy to DIY with a drill |
| Typical total without rods | $300–$1,200 | $800–$2,200 | $1,500–$4,500 | Complex staircases (multiple landings, winders) can exceed $5,000 |
| Typical total with rods | $600–$2,400 | $1,200–$3,600 | $1,800–$6,000+ | |
| Time to completion | 1–2 days (one weekend) | Half a day, plus scheduling | 1–3 weeks including binding lead time; install in a day |
Major cost factors include:
- Stair count
- Landings
- Turns
- Runner material
- Edge binding
- Regional labor rates
- Optional stair rods
Money-saving tips:
- Buy one spare runner and return it if unused.
- Skip stair rods unless you truly want the look.
- Compare independent installer quotes.
- Choose all-over patterns to reduce material waste.
Common Stair Runner Installation Mistakes
Avoid these frequent errors:
- Choosing high-pile or loose-weave runners.
- Centering each stair individually on out-of-square stairs.
- Skipping the carpet pad.
- Using excessively thick padding.
- Placing seams on tread surfaces.
- Starting without planning finish edges.
- Using staples that are too long.
- Relying entirely on carpet tape.
- Covering uncured paint or finish.
- Forgetting pattern-matching waste.
Caring for Your Stair Runner After Installation
Regular maintenance helps preserve both the appearance and the benefits of stair runners, including added comfort, traction, and longevity.
Vacuum weekly, clean spills promptly, and follow the care instructions for the runner's fiber. Wool runners generally respond best to gentle cleaning with cool water and mild soap. Every few months, inspect the staircase for loose edges, shifting seams, raised stair rods, or worn fasteners.
A properly installed wool or indoor-outdoor flatweave runner paired with a quality pad can last 10 years or more, while materials such as jute and cotton may wear out sooner under heavy foot traffic.
If you're installing a runner on painted stairs, wait until the paint has fully cured. It's also best to remove existing carpet before installing a new runner rather than covering it.
Conclusion
Installing a stair runner is one of those projects that looks intimidating until you break it into individual stairs. Choose a tight, low-pile runner, calculate your length carefully, and buy roughly 10% extra for joins and trimming. Use a thin carpet pad, establish one straight reference edge, start at the top, and work downward with consistent tension.
For a straight wooden staircase, DIY installation can usually be completed in a weekend and can save significantly on labor. If your staircase has winders, multiple landings, complicated corners, or custom-bound carpet, getting a professional quote is often the smarter investment.
Once you're ready to choose your materials, start with a quality runner, the right pad, and a realistic plan for the staircase you're actually working with. For inspiration on styles and layouts, browse these stair runner design ideas before choosing a width.
Frequently Asked Questions About Installing Stair Runners
Can I install a stair runner myself?
Yes. A straight staircase with pre-made runners is a solid DIY project for homeowners comfortable with measuring, cutting, and using a staple gun. Most installations take one weekend.
How much does it cost to install a stair runner?
DIY projects typically range from $300 to $1,200. Professionally installed custom runner projects commonly range from $1,500 to $4,500 or more depending on materials and staircase complexity.
How many runners do I need for my stairs?
Measure tread depth and riser height, multiply by the number of stairs, then add a finishing allowance and roughly 10% extra for trimming and pattern matching.
Do you start a stair runner at the top or bottom?
Most installers begin at the top. Starting at the top lets you conceal the first attachment point and maintain a finished appearance at the upper landing.
What is the difference between waterfall and Hollywood installation?
Waterfall installation lets the runner drop naturally from tread to riser. Hollywood installation wraps tightly beneath each nosing for a custom upholstered look.
Do you need a carpet pad under a stair runner?
Yes. A thin, dense felt or felt-rubber pad improves comfort, traction, appearance, and durability while reducing wear on the runner.
How do you install a stair runner without nails?
You can use carpet tape, hook-and-loop systems, removable grippers, or individual stair treads. These options are less permanent and generally less durable.
How do you install a stair runner on a landing?
You can continue the runner across the landing or stop the runner and place a separate coordinated rug before restarting on the next flight.
How wide should a stair runner be?
Most homeowners choose a width that leaves 3 to 5 inches of exposed wood on each side of the staircase.
Are stair rods necessary?
No. Stair rods are decorative and do not secure the runner. They are mainly used for visual appeal and to help conceal seams.
What kind of staple gun do I need?
A heavy-duty manual stapler works for small projects, while electric staple guns offer the best balance of convenience and value for most homeowners.
How long does installation take?
A standard 12- to 16-stair staircase typically requires 6 to 10 hours, often completed over one weekend.
Recent Posts
-
Best Rug Pads for Hardwood Floors: How to Choose One That Won’t Damage Your Finish
Choosing the right rug pad for hardwood floors is about more than preventing slips. A quality pad al
-

How to Install Stair Runners: A Step-by-Step DIY Guide (With Costs)
Learning how to install stair runners can transform a plain wooden staircase into a safer, quieter,